Garandomatic Posted July 9, 2016 Share #1 Posted July 9, 2016 I plan to post the progress shots after these nearly finished pictures... I'm pressed for time, and will have to get to some of the little things I did in the process of finishing this halftrack later. Thanks, also, needs to go out to those that answered questions about the details of the vehicle. Also, I want this to be a part of a small diorama in which the officer in the back of the halftrack is interacting with a couple of MPs in a ruined village in Germany as an M7 Priest moves up to pass them as if they are getting ready to deploy but the M7 will begin after I try to make a 1/48th B-17G model of my beloved "Punched Fowl." Here's the front... Man, I love pigments and MIG Wet Effects... Link to comment Share on other sites More sharing options...
Garandomatic Posted July 9, 2016 Author Share #2 Posted July 9, 2016 One side Link to comment Share on other sites More sharing options...
Garandomatic Posted July 9, 2016 Author Share #3 Posted July 9, 2016 The other... More to follow! Link to comment Share on other sites More sharing options...
Garandomatic Posted July 9, 2016 Author Share #4 Posted July 9, 2016 Here's the real article for reference... Looks like the real one is a little cleaner than mine, but I imagine when the snow started melting, it got plenty nasty. Note the M7s in the background! Link to comment Share on other sites More sharing options...
patches Posted July 9, 2016 Share #5 Posted July 9, 2016 Looks great, whats the kit? Tamiya? Link to comment Share on other sites More sharing options...
Garandomatic Posted July 9, 2016 Author Share #6 Posted July 9, 2016 The Tamiya kit is really weird, an M3A2 ite something, and it only existed as a prototype in reality. This one is a Dragon kit, and i think the best one on the market. Only problem is, they don't make a crew! I had tons of problems making the crew I used actually fit reasonably. Link to comment Share on other sites More sharing options...
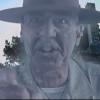
Garandomatic Posted July 9, 2016 Author Share #7 Posted July 9, 2016 Here's McEndree. Later on, I will post pictures of the grouping, which consists of a photo album and some WWI effects from relatives, as well as his uniform. The album is where I found the picture of the halftrack, which allowed me to be fairly accurate. It apparently had an antenna mounted behind the driver's side jump seat, as the main antenna mount is clearly empty. Also, the single .50 mounted up front and the shelf on the back are taken directly from the photo. The nickname I had to make my best guess about... Abner... Antler? I went with the latter because the spacing persuaded me that that would be correct. Also, the field phone is visible in the photo, which inspired me to load a couple of spools of commo wire in the back, one of which is borrowed German wire. I tried to pack this thing lightly, as the field photo shows it with nothing on it whatsoever. Only thing I didn't do, and I may still, is add the hardware at the rear of the shelf that they wrapped the wire around to secure it. Picture isn't clear enough to see, and honestly, I hoped I could just cover it up with something, but that didn't happen. Link to comment Share on other sites More sharing options...
268th C.A. Posted July 9, 2016 Share #8 Posted July 9, 2016 Very Cool looking half track! Great detail. I had the opportunity once too drive one, there fun to put through the trails & ditches.... Link to comment Share on other sites More sharing options...
The Meatcan Posted July 9, 2016 Share #9 Posted July 9, 2016 Wow your track looks fantastic! Can't wait to see more pix. Really well done! Terry Link to comment Share on other sites More sharing options...
Ronny67 Posted July 9, 2016 Share #10 Posted July 9, 2016 I love it. So dirty! So combat.... Link to comment Share on other sites More sharing options...
Proud Kraut Posted July 9, 2016 Share #11 Posted July 9, 2016 This is a fantastic halftrack. You did a superb job on the weathering! I'm not sure if I missed it but was McEndree a forward observer? In other words, which subunits of a Fiel Arty Bn used the M2? Thanks for sharing another great kit! Lars Link to comment Share on other sites More sharing options...
Garandomatic Posted July 9, 2016 Author Share #12 Posted July 9, 2016 Thanks everybody, proud kraut, that means a lot! I think he was the driver for the battery radio track, but i could be wrong. There's a good bit of paperwork with the grouping that I'll have to check, but he could have been anything in the halftrack, i guess. I've got a few pictures of him, one with a Thompson that's pretty cool, and a truck that he drove in the States. He was an artilleryman with the 134th fa before the war, and I've got a good unit photo from that time of him. Neatest thing is a list of towns they went through. I'll post some of that later on. Link to comment Share on other sites More sharing options...
doyler Posted July 9, 2016 Share #13 Posted July 9, 2016 What an awesome build.Love the dirty look....outstanding Link to comment Share on other sites More sharing options...
patches Posted July 10, 2016 Share #14 Posted July 10, 2016 As a sidebar, here's a helmet complete from the 342nd Armd FA Bn from the collection of USMC-RECON0321. http://www.usmilitariaforum.com/forums/index.php?/topic/238135-sgt-clyde-a-loomis-342nd-armored-field-artillery-helmet-set/ It was also at one point attached to the 100th Inf Div. http://www.unithistories.com/units_index/default.asp?file=../units/100th%20Inf.Div.htm Link to comment Share on other sites More sharing options...
Proud Kraut Posted July 10, 2016 Share #15 Posted July 10, 2016 As a sidebar, here's a helmet complete from the 342nd Armd FA Bn from the collection of USMC-RECON0321. http://www.usmilitariaforum.com/forums/index.php?/topic/238135-sgt-clyde-a-loomis-342nd-armored-field-artillery-helmet-set/ It was also at one point attached to the 100th Inf Div. http://www.unithistories.com/units_index/default.asp?file=../units/100th%20Inf.Div.htm A soldier's grouping/photo album leads to a great model, this leads back to the soldier's military history which leads to other military collectibles and unit histories....that's why I love this forum. Link to comment Share on other sites More sharing options...
patches Posted July 10, 2016 Share #16 Posted July 10, 2016 A soldier's grouping/photo album leads to a great model, this leads back to the soldier's military history which leads to other military collectibles and unit histories....that's why I love this forum. Yes it's all relative, this is why I give more info on IDed insignia and other items on a lot of topics, for me it's not only good to know the unit in question, but to know about them, what they did and when, when they were around etc etc. Link to comment Share on other sites More sharing options...
fstop61 Posted July 10, 2016 Share #17 Posted July 10, 2016 Fantastic job! great attention to detail. Link to comment Share on other sites More sharing options...
Garandomatic Posted July 12, 2016 Author Share #18 Posted July 12, 2016 Thanks again for all of the compliments, I appreciate it, and this build was pretty fun. Sure would like to get a real one someday! I'm going to post a few of the build photos, and probably post the figures later. Up first is basically the frame of the vehicle. I deviated from the directions here, because they direct you to assemble the rear suspension and then put the track around it, as the track is plastic cast in two halves. This would never do, as it makes it hard to paint each component, and I was happy to see that you can, in fact, finagle the bogey and road wheels in there, as well as the drive and idler wheels. If I recall, I had to remove the bogey wheel to make it fit. This model took some studying before I figured out a sound approach, as it was fairly complicated. I figured I would assemble and do a little bit of weathering on the chassis first, then assemble the cab in its two pieces to mount later and just mask off what I had already done. Link to comment Share on other sites More sharing options...
Garandomatic Posted July 12, 2016 Author Share #19 Posted July 12, 2016 After assembling the cab parts, I primed them both and brush painted the underneath since it would be fairly inaccessible! Here you see the chassis drybrushed with Vallejo buff with some of the rust wash they make and my own grime wash for the engine, which is sadly entombed forever under the hood. Link to comment Share on other sites More sharing options...
Garandomatic Posted July 12, 2016 Author Share #20 Posted July 12, 2016 THis is one of Dragon's "Smart Kits," which makes it really nice. Came with plenty of extras in terms of MGs, pioneer tools, etc. The photo-etched parts made a nice touch, but I hate working with it. I'd rate what you see here to be fairly simple compared to say, the bomb bay doors of a B-17 that you have to totally assemble from flat sheets of parts... But this stuff was difficult no matter how simple. Sure looks good though... Link to comment Share on other sites More sharing options...
Garandomatic Posted July 12, 2016 Author Share #21 Posted July 12, 2016 Here you see the body assembled on the chassis right after it was painted. In hindsight, this wasn't a major undertaking, but I was afraid it would be difficult to join the three major components (chassis, cab, rear) and finish the seams in a way that wouldn't damage other work I'd already done. I figured it would come out OK, as these things were mostly bolted together anyway. Link to comment Share on other sites More sharing options...
Garandomatic Posted July 12, 2016 Author Share #22 Posted July 12, 2016 I next threw in all of the basic parts that weren't on it for airbrushing, such as the seats, front jerry cans, etc. and drybrushed everything with Vallejo buff. In a few places, I really managed to catch the look of dirt and mud that had been splashed onto it and then washed off with rain or melting snow, leaving that haze... Link to comment Share on other sites More sharing options...
Garandomatic Posted July 12, 2016 Author Share #23 Posted July 12, 2016 In the original photo, the real vehicle has a field-made shelf on the back, an I constructed this the same way they would have... angle iron and planks. The angle iron was plastruct, 1/8" I think... the planks were actual walnut that were leftovers when my dad ripped the edge of a large walnut board to square it up. I put a lot of work that was later hidden into them... sanded them to look worn, grime wash, etc. Link to comment Share on other sites More sharing options...
Garandomatic Posted July 12, 2016 Author Share #24 Posted July 12, 2016 Finished piece... Link to comment Share on other sites More sharing options...
Garandomatic Posted July 12, 2016 Author Share #25 Posted July 12, 2016 That's it for now, next I will post the figures. They really drug this build to a crawl, as I had to make a driver fit in this thing somehow, and also required me to put the windshield, MG skate rail, and a few other bits in afterward. Lots of filing, dremel work, more filing, more dremel, cutting their hind ends, dremeling out the seats, very tedious work. I am pretty proud of some of the accomplishments I made with them, but they are again my weakness. Next 1/35 build, I want to see if I can make a change, as I mis-remembered the excellent how-to post here, and was using acrylic brown to shade the skin as opposed to oil paint. Like with the M5A1 I built, I made as many pieces of web gear and clothing as I could just a shade different, not that much of that shows up! Link to comment Share on other sites More sharing options...

Recommended Posts
Create an account or sign in to comment
You need to be a member in order to leave a comment
Create an account
Sign up for a new account in our community. It's easy!
Register a new accountSign in
Already have an account? Sign in here.
Sign In Now